Hunt, Catch, Cook - Catching
How To Cook and Clean Blue Swimmer Crab
Blue Swimmer crabs have a clean sweet flavour. The most common way of cooking them is by poaching then. This is done by putting them into boiling water until cooked.
The preparation is quite easy. Place a large pot of water on to boil. Place sliced onions, celery, bay leaves, whole peppercorns, salt, sliced lemon and about 50 ml of white wine per litre of water into the pot. This is called a court bullion. Ensure the pot has at least double the capacity for water to the space the crabs will take up in the pot. This will ensure a consistent cooking time and doneness of the crabs when cooked. It may be necessary to put on a few pots and cook the crabs in batches.
Whilst waiting for the pot to boil, Give the crabs a thorough rinse and clean off any algae or dirt. Sort through the crabs and arrange them from largest to smallest. For those sensitive to the idea of putting live crabs into boiling water, you can place them into the freezer for 10 minutes to put them to sleep!
Once the pot has come to a strong boil add the crabs starting with the large ones first. Immediately cover the pot so that it comes back to the boil as quickly as possible. When the boil resumes, remove the cover. Cooking times for 127mm crabs are approx. 10-12 minutes from when 1st placed into the boiling water. For larger crabs cooking times will take approx. 12-14 minutes from when 1st placed into the boiling water. Set a timer. Fill a sink, bowl or tub with iced water. Once the cooking time has expired, remove the crabs from the boiling water and place directly into the iced water. This will quickly stop the cooking process and avoid the likelihood of the crabs becoming over cooked. Drain the crabs off.
To clean the crabs turn them over, lift up the tail towards the rear of the shell. Carefully pull the top carapace shell away from the bottom shell. Peel off the “Dead Man`s Fingers” which are the grey coloured finger looking filters on either side of the crab (do not eat these). Turn the crab up and gently remove the stomach contents that runs through the middle towards the eyes. With your thumbs, peel down at the front to remove the eyes and the mouth/filters. Very gently rinse the stomach cavity with slow running water to clean. Avoid getting it too wet as the meat will become waterlogged. The crab can now be split directly in half. Partly crack the large claws for ease of access and serve as is with fresh bread, salad and dressings.
The crab can be eaten directly from the shell. The best way to get the meat out is to use one of the claws or a skewer to pick it out. The good old Crabby Sandwich is an absolute taste sensation, with a little salad, salt & pepper and mayonnaise type dressing. Make sure to feel through the crab meat to ensure there is no shell left in it before eating.
If harvesting crab meat for latter use in dishes such as Salads, Pasta, soups etc, you can prepare as per the above. Ensure to feel through the meat and remove any shell. The best way to freeze Crab meat is to vacuum seal or place into a zip lock bag and expel any air from the bag prior to placing in the freezer. Freeze for up to 3 months.
My video on How To Clean Blue Swimmer Crab.

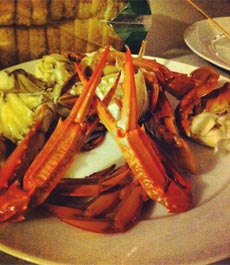
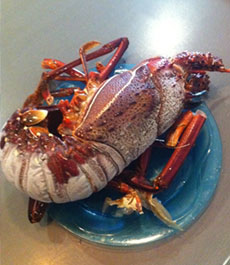
How To Cook and Clean Crayfish
You will Need:
- Large pot of water (do not fill pot to the top otherwise it will overflow when the crayfish goes in)
- Bowl to sit cray in
- Ice water with ice in or bag of ice
- Tongs - to remove cray from hot water
- Bowl with clean water (for cleaning)
Method:
- Fresh (Live) lobster should be wrapped in a plastic bag or similar and placed in the freezer for approximately 5-8 minutes to euthanize them and reduce the risk of the tail flicking hot water during the cooking process.
- Bring water to the boil and add a good pinch of salt (approximately half a teaspoon)
- Add the lobster to the boiling water.
- When water starts to return to a gentle boil, start timing the cooking process:
- 600 - 800 grams = 9 to 10 minutes
- 800 - 1000 grams = 11 to 12 minutes
- 1000 grams = 12 minutes
- For every 100g over 1000 add another minute. Eg: 2kg+ = 22 minutes
- After the required cooking time submerge lobster in a bowl of ice water to cool. (this will prevent the lobster from further cooking) leave in ice water for approximately 5 minutes.
- At this stage lobsters can be covered or wrapped and refrigerated for a maximum 4 days or covered and wrapped in plastic wrap and frozen for up to 3 months.
My video on How To Cook and Clean Crayfish.
An Introduction to Fly Fishing
Fly Fishing is a form of fishing used to deliver an artificial lure to where the fish may be feeding. The theory is the same as casting lures with a conventional rod & reel, trolling lures or casting baits to either where you can see fish or where you think they may be. It all sounds so simple in theory and we`re often left wondering why we don`t catch hundreds of fish every time we go fishing!
Fly fishing involves the challenge of being able to cast a long length of weighted line on a long flexible rod. Surprisingly the Fly casting theory is fairly simple and is made up of a combination of line speed, timing and rod loading.
Getting Started
You can spend as much or as little as you like on any fishing gear. Fly Fishing gear is no different when it comes to potential cost. As with all fishing gear, the” high end “tackle can cost hundreds to over a thousand dollars just for individual rods or reels. Some “high end” tackle is specially designed for power, long casting distance, finesse etc., etc. For people new to Fly Fishing I would suggest buying a balanced Fly Fishing combo kit and recommend that you only pay what you can afford to start off. The benefit in purchasing your first Fly Fishing outfit in a combo kit is that it generally comes with all the basic items that you need to start fishing including, rod, reel, backing, fly line, leader and some basic fly`s. To research and purchase all the required items individually could cost up to 50% more than a combo. As with any fishing there is a never ending supply of tackle and bits and pieces that will see you working till your 100 years old to afford it all. A big tip is to keep it as simple as possible and set yourself up to be as mobile as possible when fishing because at times you will do a lot of walking to cover as much water as possible in search of fish and dragging around a tackle box becomes quite an inconvenience. For beginners a 7 or 8 weight outfit will be able to handle most species and conditions. It would be best to purchase a Salt water model that is less susceptible to rusting and so that you have the option of using it in both fresh and salt water. Now you`re ready to fish…. Um not just yet.
Fly Tackle Language
Fly Rod - The Fly rod is generally 9 Foot in Length and made from a variety of materials. It is long and flexible to allow loading of the Rod when casting and to provide cushioning a strength when playing fish. The Reel seat is generally short and there is only a small to no butt on the Rod. Fly Rods are rated by Weight. This weight is relevant to the Fly line which is also rated by weight to match that of the Rod for a balanced and efficient combination.
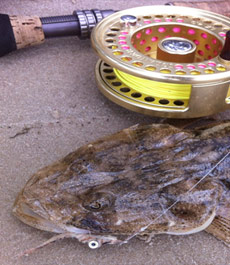
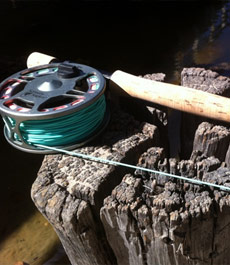
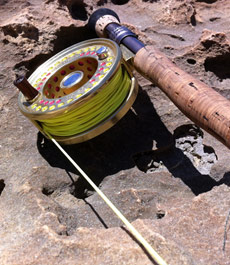
Fly Reel – The Fly Reel is a centre pin design. It is mostly used to store the backing and line. The appearance and design is fairly open to allow good drainage & drying ability for the stored line. The drag system is mainly a disk drag system which is operated by a dial on the side of the reel.
Fly Line Backing – The Backing is the length of line that sits behind the Fly Line. Backing used on Fly Reels in generally Dacron or Heavier Braid. Backing is required because the actual Fly Line is normally only 30 meters long and additional line is required when the big one gets on and starts peeling line from the Reel.
Fly Line – Fly lines are made of plastic type materials. Different fly lines have different cores such as braided line for strength, lead and weighted type cores for sinking and aerated cores to allow for flotation. The lines can be tapered in thickness to allow for different casting ability and effect. Fly lines come in a variety of effects usually contained in the last few meters that provide for floating presentations, intermediate is a slow sinking line for slower sinking presentation and fast sinking to get the Fly down quickly for deeper presentations. Fly lines are rated by Weight to match with the Fly Rod. As a rule you would use the same weight Fly line as the weight rating of the Fly rod. It is possible to run a heavier weighted line than the Rods weighting. This will allow for greater loading in the rod and in some cases provide extra casting distance and control.
Leader – Leader is the link between the fly line and the Fly. It is made from clear monofilament or fluorocarbon. Leaders are often tapered from thick at the butt end that joins to the Fly line and thinner at the end that the fly is attached. Leaders can be up to14 foot in length if fishing in clear water to timid fish. The most common length used is about 9 foot long and is normally long enough so that the Fly line does not spook fish. For toothy fish a heavier length of leader can be attached to the leader to avoid bite offs.
Fly`s
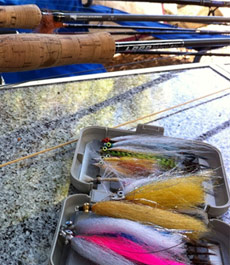
Dry Fly`s – Dry flies are light weight fly`s that are tied with light aerated materials. They replicate surface type insects that sit or fall on top of the water surface film. They are often sprayed or coated with floatation providing materials Wet / Terrestrial Fly`s – Wet and terrestrial fly`s imitate the multitude of sub surface fish, crustation`s, insect`s, larvae, cephalopods, amphibians and any type of live or weed type food that fish eat.
Poppers – Poppers are surface fly’s that are retrieved along the water surface. They displace water during the retrieve which gives the effect of something on the surface. Some poppers have a large face that causes a blooping sound on retrieval which can also attract fish to strike.
Rod Loading – Rod loading occurs during and at the end of both the forward and back cast. Rod loading is when the weight and speed on the fly line causes the rod to bend during casting. A slight pause in the casting action between the forward and back cast and vice versa allows the fly line to build up speed which equates to further distance in the cast.
Learning to Cast a Fly Rod
There`s not much more exciting than getting new fishing gear and thinking about and anticipating all the big fish that you are going to catch with it. Fly casting can be very challenging to those new to it. Learning to fly fish should start by researching the techniques involved and where possible find an experienced Fly Fisher to show you how. Most Fly Fisher’s are more than happy to share their knowledge and skills which is due to their love of Fly Fishing. There are also many books and also videos on the internet that go into extreme detail. Once you understand the principles I strongly recommend taking your Fly outfit to the local oval and start practicing there. This allows a good open area to learn and also removes the pressure of thinking about catching fish. Do not attach any leader and especially no Fly`s as they can quite easily provide you with an unwanted painful piercing. One of the most important things that I did when I first started to fly cast was to alternate hands. As the whole technique was new and strange, I started with 5 casts with the right hand and then 5 casts with the left hand and it quickly became comfortable with either hand. The reason that I recommend this is that if you can cast with both hands your fishing sessions can last a lot longer. The other huge benefit is that regardless which direction the wind is coming from or which side of you the trees, sticks, tall grass, wind, other fishermen are, you can still fish quite easily with either hand without having your line or Fly snagging up on yourself, structure or other people. By the way, hooking another person whilst Fly Fishing is quite frowned upon.
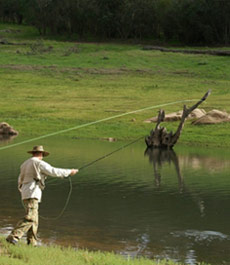
To start off allow plenty of space around you. Let`s say you are starting with your right hand. If it is windy it is best to stand facing in a direction that allows the wind to come from your left hand side. This causes the fly line to move away from your body whilst it is being cast in the air. Reel all of the line onto the reel so that there is no line exposed. This is where the technical bit starts. This may sound strange but imagine that the fly rod is part of your arm and is a hand on a clock face. When you hold it pointing straight up, that would be 12 o`clock. If you hold it horizontally behind you it would be at 3 o`clock and if you hold it horizontally forward this would be 9 o`clock. Now imagine where 10 o`clock and 2 o`clock would be. It is between 10 o`clock and 2 o`clock that most of the Fly casting action happens. Another important point to remember is that where the end of the rod tip points too during the pause in the cast the line will follow. This means that if the rod is allowed to go to 3 o`clock or 9 o`clock or further on either side there is a high chance that the line could hit the water in front or ground behind and get tangled or snagged up. With the line all on the reel just practice moving the Fly rod between 10 o`clock and 2 o`clock at a speed of 1 and 2 and 1 and 2 and 1 and 2 and 1 and 2 with a pause of 1 second on “and” which is before changing the direction of the casting action. Repeat the forward and back cast action about 4 times then on the 4th time forward stop the casting action abruptly at 9 o`clock. You will notice that the Rod bends during the slight pause in casting direction. When the line is out this bend will increase with the weight of the Fly line loading the rod and creating power and line speed when the direction is changed. Once your are familiar with that basic direction and timing, peel about 3 to 5 meters of Fly line out from the end of the rod and lay it out in a straight line heading away from you. With your left hand lay the line across your fingers and gently pinch down with your thumb. This controls how you allow the line to be fed out during the casting action.
The point that you release the thumb pressure on the line is during the pause on both the forward and back cast which then allows the line to feed out. Make sure to return the thumb pressure on the line before the cast changes direction otherwise line will continue to feed out stopping the rod loading and then causing the line to slow down and lose momentum. Whilst holding the rod at 9 o`clock, quickly raise it to 2 o`clock and continue with the previously practiced timing and pauses. What you are looking for is the rod loading forward on the back cast causing the line to quickly fly into the air, when the rod stops at 2 o`clock the line rolls past the rod tip in a loop causing the rod to load backwards. The pause in the cast allows the line to straighten out in the air behind you. It is then that a small amount of line is released by reducing the thumb pressure. The forward cast then begins. Initially just practice the casting between 2 o`clock and 10 o`clock for a while whilst watching the line in the air rolling out at the pause on each direction change. You will begin to feel the line pulling under your thumb which signifies the time where you can lightly release that thumb pressure to release the line.
Once you get used to the feel, finish the cast with the abrupt stop at 9 o`clock on the forward cast, which will roll the line out straight in front of you. Have a little extra fly line off the reel for when you stop the forward cast and release the thumb pressure again to allow the extra line to shoot out through the rod when the final forward cast stops abruptly at 9 o`clock. This allows extra distance in the cast. If you hear the line cracking like a whip during the casting action you will need to slow down the casting speed or change the duration of the pause and watch the line during the back and forward casts to see that it is rolling out and loading the rod. Once you are comfortable with the casting action and it is feeling smooth you can peel more line off the reel and lay it in a neat coil in front of your feet and continue to practice the casting action, feeding out line and the final stop in the forward cast to lay the line out. Once the line has been smoothly cast out you can then start the retrieve. This is done by lightly holding the line on one of your fingers on the hand that is holding the rod. With the other hand strip small lengths of line in, this will start the line moving back towards you. The speed at which the line is stripped in can vary depending on the species you are fishing for. Some fish require a slow and steady retrieve and others require a speed close to furious. It`s best to alternate your retrieve speed until you find one that works for you. The retrieve can be mixed up with small twitches of the rod tip to impart extra action on the fly to entice fish to strike.
How far do I need to cast?
Most fly lines are about 30 meters long. If you can cast 5- 10 meters you will be ready to fish. In some cases fish can be caught within only a few meters of you. When searching for fish it is defiantly a benefit to be able to cast further. Longer casting comes with practice, experience and the capabilities of your outfit. Surprisingly there are not a lot of fly fishers that cast a full 30 meter fly line, so don’t get tied up in distance envy. The only way to catch fish on Fly is to go fly fishing, the more you do it the more you will learn, and the more you learn the more you will catch fish.
Safety
As with any fishing adventures it is always important to become familiar with your surroundings. Test water depths if you are going to wade into the water. Be aware of predators such as crocodiles, wild cats, wild dogs, cattle and sharks etc that may inhabit the area. Last thing you want is to become the target species and part of the food chain. Ensure the area is not prone to flooding, especially if heavy rain is forecast for the immediate and inland areas. Check weather forecasts as you will need to get out of remote areas, which could become difficult if it rains. Carry a first aid kit and know how to use it. One very important thing for Fly Fishers is glasses to protect your eyes. As Fly casting involves the aerial casting of a very sharp hook, there is always the risk that it could come back and hit you. The last place you need a hook is in your eye so defiantly wear glasses. The best type of glasses for Fly fishing is polarised glasses, as these allow you to see through the surface glare on the water and quite often to spot fish. Sun protection is always recommended in the form of sunscreen, hats, long sleeve shirts, long pants and gloves for hot days with a high UV index. Always tell someone where you are going and when you expect to be back. Carry a mobile phone where possible so that you can call for immediate help if necessary and reception allowing.
Choosing a location and target species
It is very important when choosing a location to fish, that you research the different species of fish that inhabit the area. This will broaden your options when choosing which type of fly to tie on. When making your fly selection the main thing to allow for is the type of food that the fish in the area eat. If a variety of different fish that inhabit the area eat similar items, then a pattern that replicates that food type should be selected. Where possible try to observe any potential foods that are swimming or moving around in the water and try to match these with a fly in the same detail and size. When trout fishing it`s very important to observe any insects that may be flying around or sitting on the waters surface film. If you notice trout rising to take the insects off the surface you would then choose a fly that matches the hatch. Try to keep quiet and a low profile when approaching the water as quite often fish can be found feeding in shallow water close to the waters edge and be spooked easily on your approach. At different times of the year, different insects tend to be around. It is a good idea to keep a Fly fishing diary that you can put in dates and document the conditions and any insect activity as well as any captures and what fly they were caught on. This will all help when planning future trips.
There is one last thing to be aware of, Fly Fishing is highly addictive and a never ending learning experience. Good luck and enjoy the adventure.
