Hunt, Catch, Cook - Tips and Techniques
How To Assemble A Survival Kit
A few key items can make all the difference in the fight for survival. There are four requirements which you must control to remain alive: WATER - WARMTH - SHELTER - FOOD.
It pays to give the contents of a survival kit a lot of thought and to plan your emergency survival strategies in advance by asking yourself a lot of “what if ” questions about likely accidents or emergency situations. Although survival kits can carry key items, use and knowledge on how to use these items are essential and should be backed up with a survival coarse or training of some description. This can tip the balance between failure and success.
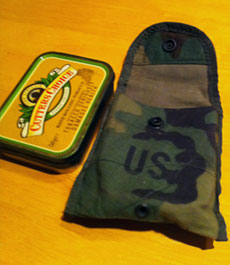
A survival kit should fit in to a small container slipped into a pocket or bag and can be carried anywhere. The contents of your survival kit should be checked regularly, changing any items which deteriorate. Never leave the tin open or lying around and always seal it with tape to waterproof after opening it. The following is a list of items and their uses for an individual survival kit.
- Small plastic/steel container (strong) - kit contents, holding items, containers for mixing or drinking.
- Flint - with attached striker - fire lighting, night signals.
- Cotton wool pad - fire lighting tinder and first aid.
- Compass - direction finding.
- Knife - cutting, probing, wood carving.
- Plastic mirror - signalling, self first aid.
- Hacksaw blade - making emergency repairs - removing parts off vehicles / fence.
- Plastic bag - water collecting, carrying, storage rain/wind proofing, floatation.
- Needle - sewing, probing, surgery, eye accepts fishing line for thread.
- Fishing line - fishing, binding, sewing. snaring.
- Fishing hooks - fishing, barbs on fishing spears, gaff, pinning.
- Bass swivel - fishing, stops line twisting, make fishing fly with. Sinkers – line weights.
- Trace wire - fishing trace, snares, binding, general repairs.
- Stock cubes - makes a soup that abates hunger and is pyhsicologically satisfying.
- Cord - multiple use.
- Tea bag - brew ( multiple times ), soothes sun burn.
- Glucose tablet - sweetens tea, gives energy boost, fire making with Condy’s crystals.
- Paper/pencil - aid in memoirs and note making.
- Puri Tabs - 1 Tablet per 2 litres of water wait 30 minutes before drinking.
- Condy’s crystals - antiseptic, water purrifying, fire lighting.
- Band Aids - covering small cuts and abraisions.
- Scalpel blade - probing for splinters, delicate cutting.
- Tweezers - removing splinters - other minor operations.
- Paracetamol tablets – suppressing pain and mild fever.
- Alcohol swabs - sterilizing/cleaning skin wounds, fire lighting.
- Small survival knife - flat side for sharpening, thumb and lanyard hole for around neck carrying.
If you are ever in a survival situation you must execute the A,B,C of survival.
- A - Accept the situation.
- B - Brew up a cup of tea.
- C - Consider all possibilities.
- D - Decide on a plan.
- E - Execute your plan.
If lost generally water is the most important. In variable climates the relative significance of shelter and water may change. Guard against dehydration and exposure which are usually the greatest danger in any arid survival situation. If in a vehicle, (a vehicle is easier to find than a lone person) should the need to leave arise be certain of distance and direction and leave with much caution.

How To Sharpen A Knife
There are many ways to sharpen a knife - but his method produces a good general purpose edge.
Remember - A sharp knife is important for safety. A dull or blunt knife is more prone to be pushed or slip resulting in a bodily injury.
The first thing you will need to do is select a good quality whetstone. Usually the more expensive in price the better quality. A good stone will have a coarse and fine side - this is important in maintaining a good edge.
- Select the coarse side of the stone first and lubricate the stone. Check with manufacturer's guidelines first. Most stones can be lubricated with water however there are some stones that are specifically designed for oil and will be generally labelled as ”oil “.
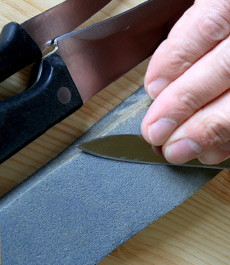
- For a symmetrical edge sharpen the knife by holding it approximately 22 degrees to the stone surface, (90 degrees being resting the knife edge straight up and down on the stone), drag it across the stone in the opposite direction you would move it to slice a thin layer off the stone. Continue grinding at this angle until you are satisfied you have sharpened the full length of the blade. This doesn't need to be precise, just well estimated.
- Flip the knife over and sharpen the other side of the blade at the same angle until you create a new edge. The easiest way to determine that you have removed enough metal is to sharpen until you have raised a burr. A feature that steel will naturally form when one bevel is ground until it meets another. It will generally be to small to see but you can feel it catching on your thumb if you stroke away from the edge.
- Flip the stone over and repeat the process. This will remove the resulting burr. Remembering your still holding the knife at a 22 degree angle.
- You may now run the knife over a steel. This will further polish the edge to the desired sharpness, holding the steel in one hand and the knife firmly gripped in the other run the knife blade down the steel at an angle of 22 degrees away from your body approximately 6-8 times on each side.
The use of a sharpening steel to hone your knives will ensure they stay sharp. Keep your sharpening steel easily accessible and use it regularly.
How To Smoke Meat
So why smoke meat? There are a number of reasons. Besides enhancing the taste and look it also increases it’s longevity and helps preserve the meat by slowing down the spoilage of fat and growth of bacteria.
Lots of people get confused with grilling as a way of smoking. The purpose of grilling is to char the surface of meat and seal in the juices by creating a smoky caramelized crust. At the same time this process prevents the meat from becoming smoked. Sure the meat will have a smokey flavour but that’s about it. To smoke something you need a container to hold in the smoke, a source of the smoke and some food to be smoked.
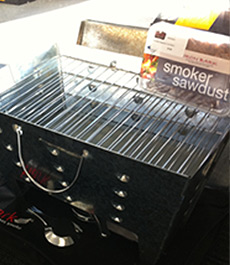
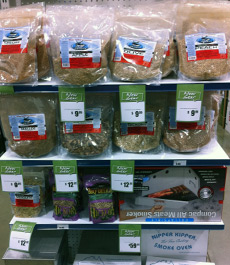
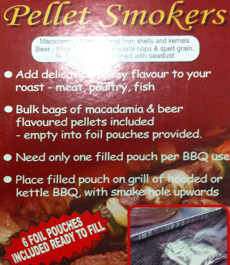
A smoker can be anything from a hole in the ground to an elaborate $2000 smoker. The source of the smoke is typically hard wood chips and some times saw dust or shavings but times have changed and you can now purchase pellets.
What to smoke is purely a mater of taste, however smoking has grown around cuts of meats that don’t come out well with any other method of cooking. Basically there are two ways to smoke food: Hot Smoking and Cold Smoking.
Cold Smoking
Cold smoking can be achieved by either using chemical preservatives to flavour and colour the food or by piping smoke from a nearby fire to the food, surrounding and flavouring the food with cold smoke. After the smoking process, cold smoked food must be cooked before eating.
Hot Smoking
The basics of hot smoking is to keep the temperature low and the heat slow. Meat smoking is best done in the temperature range of 200°F - 220°F and poultry 165°F. There are 2 reasons to keep the temperature low, one is to give the smoke enough time to penetrate and the other is to tenderise the meat.
In hot smoking a reservoir in the base of the smoker holds a heat source – usually methylated spirits. The amount of methylated spirit will dictate the amount of smoking time for the food. When lit the heat will heat the wood shavings or pellets that smolder due to a shortage of oxygen. The smoke emitted from the wood shavings flavours the food and the heat generated cooks it at the same time. With hot smoking the flavour of the finished product depends upon the type of sawdust or pellets used to create the smoke.
The following are some points to consider when purchasing or trying smoking:
- Sawdust and pellets come in a variety of flavours including: hickory, bourbon, rum, teriyaki etc. Try them on small cuts of meat first to determine what flavour suits your taste.
- If using methylated spirits - be careful of metho flare ups and distribute the meat evenly around the smoker. I have found in some portable smokers, if you put meat directly over the heat source or sawdust that the meat comes out burnt.
- Most smokers or portable smokers on the market are designed for fish and have very limited room for bigger cuts of meat or even a whole chicken. Do your research before you make your purchase and have a good look inside the smoker.
- An alternative to purchasing a smoker, is using a smoking box. A small stainless steal box approximately the size of a house brick that holds pellets or sawdust and can be used in any hooded BBQ or kettle BBQ. The product is easy to use and sits directly over the flame de-fuser in gas BBQ's or on the grill just above the flame. Although a good idea you must be able to regulate and control the temperature on the BBQ and it is recommended that you have a built in thermometer.
- For best results the food to be smoked can be brined before smoking. Brining removes excess blood trapped in the flesh enabling the smoke flavour to be absorbed deeper.
How To Make Traditional Pizza Dough
Ingredients:
- 1 and 1/2 cups bread dough mix or pizza plain dough (225g)
- 1 teaspoon dried yeast
- 1 teaspoon of salt
- 3/4 of a cup (160mls) lukewarm water
- 2 teaspoons olive oil
Method:
- Place sifted flour and salt in to food processor or mixing bowl.
- Dissolve yeast in a little lukewarm warm water then stir in remaining water.
- Make a well in the centre of flour mixture, place dissolved yeast mixture and oil into the well and gradually work
the flour from the sides. - Remove dough from bowl and knead by hand until smooth and elastic (if dough is to sticky add 1-2 tablespoons
of extra flour). - Place dough in a clean bowl, cover with damp cloth and leave to rise in a warm place until doubled in volume.
- Roll out on lightly floured surface and fit to pizza pan.
Pizza Sauce:
- 2 tablespoons of olive oil
- 3 cloves of garlic
- 1 tablespoon fresh oregano
- 1 kg fresh roma tomatoes diced with skins removed
- 1 teaspoon sugar
- 1/2 teaspoon chilli flakes
- 1/2 teaspoon kosher salt
- 1 medium onion chopped
- Black pepper to taste
Method:
- In a sauce pan on medium heat add oil, onion and garlic.
- Cook stirring for approximately 1 minute add tomatoes, sugar, chilli and salt and pepper mix well to combine.
- Bring to the boil then reduce to a simmer for 90 minutes until sauce starts to thicken.
- During that time add oregano in last 1/2 hour of cooking.
- Using an immersion blender blend to a smooth sauce before bottling.
Seafood Pizza Sauce (White Sauce):
- 1 tablespoon margarine
- 1 finely chopped onion
- 2 cloves of garlic
- 1/2 teaspoon white pepper
- 1 teaspoon Dijon mustard
- 1 cup of milk
- 1/4 cup parmesan cheese
Method:
- In a medium pot melt margarine and fry onion and garlic until translucent.
- Add flour stirring into margarine and continue until all liquid is taken up.
- Add mustard and continue stirring while slowly adding milk.
- Increase heat and continue stirring adding pepper and parmesan cheese.
- Mix well over heat until mixture thickens.
- Set aside to cool.
How To Make Italian Dried Pork Sausage
When an opportunity presents itself when hunting most people take it! Sometimes its a buck that walks in front of you while out hunting or maybe that whole mob of pig's when you are only expecting just one - Just that happened to me at the start of winter last year when out hunting.
The farmer had told me he had seen a pig while out feeding the sheep in the last few afternoon's and if I head over the hill I would see it.
As I approached the area he suggested, sure enough there it was . After a quick look through the scope of the 223 I got down low and made my stalk towards it. Without notice the pig gave a quick grunt and out of the nearby bracken fern 10-15 more good size pigs appeared in the opening. I stood without notice from the pigs and let a round off, dropping the first one. As all hell broke loose I had managed to shoot another 2 before they made it to the fence.
So what would I do with this extra meat I wasn't expecting?
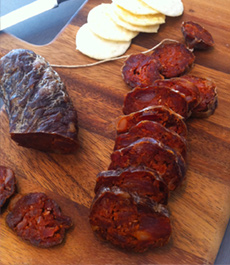
The perfect thing would be to preserve it, and the Italians have the best way of doing this. It requires no refrigeration and takes up very little space.
Italian Dried Pork Sausage
Ingredients:
- Per 10kg of meat
- 300g Coarse Lake salt
- 30g Cracked black pepper
- 20g Nutmeg powder
- 50g Sweet Paprika
- 10g Chilli (Crushed or powder)
- 20g Fennel Seed (optional)
- 20g Pork fat
Method:
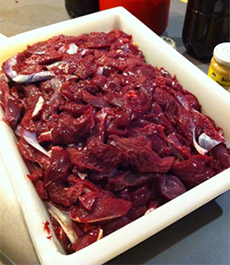
- Mince meat through 8-10mm mincing plate once.
- Add the salt and spices as listed and mix well with hands until all combined (your arms should feel like they are dropping off) and the meat should be sticky and pliable.
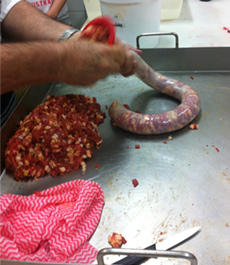
- Put through sausage filler or by hand, stuff in to hog casings or ox runners and link sausages by twisting and tying with string at required lengths.
- Place in plastic bags or containers for 7 days (allowing to ferment naturally) then hang for drying (approximately 2 weeks) once cured to perfection store vacuum packed for up to 6 months.
NOTE: mixing all meat, salt and spices should by thorough before filling into casings. Tied sausages must be pricked with a needle to allow any trapped air to escape before sausages are fermented in fridge for 7 days.
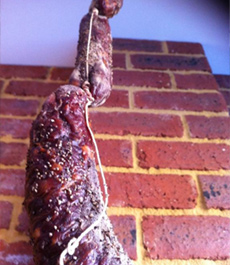
Hang to dry in a cool well ventilated area safe from fly's and rodents (the room should be below 20c) sausages cure in 14-21 days according to your taste. Ground black pepper will keep flies away and can be rubbed off the sausages when ready to eat.
How To Avoid Food Poisoning
Food Safety & Hygiene
If you have ever been the victim of Food Poisoning you would surely like to avoid it happening again. The feeling of nausea and the violent evacuation of food or beverage from both ends is the result of consuming food or beverages containing high levels of bacteria. Some bacterial microorganisms can be fatal to the human body if ingested in large amounts.
The most common causes of Food Poisoning are due to poor food handling, inadequate temperature control or cross contamination. The following information can help prevent and reduce the risk of food poisoning and cross contamination.
Temperature Control
Temperature plays a critical part in all aspects of Food preservation and preparation. All the way from the field, ocean, stream or lake to the plate it is important to control the temperature of meat, poultry, fish and dairy type products (eggs, milk). These are all classed as high risk foods, which are mostly protein based. From the moment these items cease to exist in their living form, their composition naturally begins to break down and future eating quality begins to decrease. The old saying “Fresh is Best” stands true. One of the most important factors is to maintain and control the temperature of these items all the way to the plate.
Bacteria has the ability to double in numbers every 20 minutes when not stored in the right conditions. The “Temperature Danger Zone” is the temperature between 5 deg c and 60 deg c, this is where bacteria grows the fastest.
When Hunting or Fishing for food the target species could have a core temperature of up to 36 degrees celcius on capture/collection. It is very important to reduce this temperature to below 5 degrees celcius in the shortest possible time to provide the longest possible shelf life and best eating qualities. Due to the logistics and locations of most Hunting or Fishing trips for food, it`s not always possible to have refrigeration immediately available. Prior planning is very important in ensuring that any captures are maintained in their best possible condition. Purchase or make your own ice to pack into a well-insulated esky. (Ice cream containers filled with water and Frozen are cheap and last longest). Control Target species selection and amount of targets captured/collected to ensure adequate storage available to keep cold. Field dress to break down size, which will also enable faster cooling. Carry clean packaging such as zip lock bags to pack products into. Zip lock bags will enable the product to stay clean and avoid any water damage from melting ice. For fish, leave whole and create an ice slurry to cool quickly until the temperature is bought to below 5 deg c (adding salt or using salt water in the slurry will reduce the temperature further and allow for quicker cooling). Always ensure a hygienic location when filleting fish. Pack fillets into zip lock bags to avoid them becoming water logged.
It is very important to regularly check the holding temperature of your home Refrigerator. Ideally chilled foods should be stored between 2 and 5 degrees Celsius to provide the longest possible shelf life and maintain quality. Place a thermometer in the fridge for 30 minutes, then check the reading. If the temperature is above 5 degrees Celsius the refrigerator temperature will need to be turned down. Make the adjustment, then check the temperature again an hour later until you get a constant reading below 5 degrees Celsius. Freezer temperatures for food holding should be between -15 degrees Celsius and -18 degrees Celsius. Ensure that freezers are regularly defrosted to allow them to work more efficiently and also allow more space for storage of frozen foods. As with checking your refrigerator temperature, it is also important to check the freezer temperature to ensure your frozen foods are being stored at a safe temperature.
Food Handling and Hygiene
Bacteria is present everywhere and the Human factor is the most common way that food is contaminated. Food contamination can occur from direct Human contact, contact with surfaces or the environment. These types of contamination are manageable by practicing some basic Food Handling and Hygiene techniques.
Hand washing is essential before handling any food products and also after using the toilet, touching any part of your body, touching door handles, surfaces, equipment etc and between handling different food products. The use of food handling gloves and / or instant hand sanitiser`s are recommended. Ensure fingernails are kept short & clean as bacteria can accumulate underneath them. Wear clean clothing and hair coverings as necessary. Ensure that all fruits and vegetable are washed prior to preparation or consumption. Especially the ones grown in the ground.
Bench tops, sinks, food preparation equipment, utensils, knifes, cutting boards, pots and pans all need to be adequately cleaned and sanitised. Sanitation can be via the use of chemical sanitisers or by washing with detergent and then rinsing it hot water that is above 60 deg c, as temperatures above 60 deg c kills the majority of food borne bacteria.
Try to use disposable paper towels for wiping up spills, blood or for drying hands. Avoid the use of cloths and t-towels, especially the ones that are found in most kitchens that are used to wipe up everything and eventually become bacteria hotels! This also applies to sponges and scourer`s which should be sanitised and changed regularly.
Colour coded cutting boards are an excellent way of avoiding cross contamination of food products during preparation, by using the specific coloured cutting board allocated to the specific types of high risk food products. They are fairly cheap and available in most shopping centres or Hospitality catering equipment stores.
- Red Board for Red Meat
- Blue Board for Fish/Seafood
- Yellow Board for raw Poultry
- Brown Board for Cooked Meats
- Green Board for Fruit and Vegetables
- White Board for Dairy and Cheese
Where possible avoid using wooden cutting boards, as they are porous and can easily harbour bacteria in cuts and cracks. Ensure food handling is carried out in the most hygienic location possible to avoid the risk of food contamination.
When butchering meats, fish or poultry try to avoid the meat coming into contact with the outer skin, fur, feathers and inner stomach cavity or stomach contents as there is a high chance of micro biological or faecal contamination during this process.
Freezing Meat, Fish and Poultry
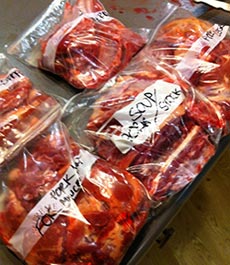
All Meats, Poultry, Fish and Seafood are generally best eaten fresh. Freezing of food allows product in excess of what is required for immediate consumption to be safely stored for future use. Correct Freezing preparation of food plays a crucial part in the final taste, texture and quality of foods. One of the best ways to freeze meat, fish and poultry is by vacuum sealing. Vacuum sealing removes the air from the plastic vacuum bags and provides a tight seal. It is always best to pat dry the product you are freezing with disposable paper towel prior to packaging. This will eliminate any excess moisture crystallising on the products surface when freezing. Ice crystallisation on the surface of meats damages the outer surface of the meat and creates excessive drip loss during the defrosting process. If vacuum sealing is not an option, the next best options are to use zip lock bags or Cling wrap. Again, ensure to pat dry the product and ensure the tightest possible surface contact and coverage and expel as much air from the packaging. By wrapping tightly, you eliminate the risk of leakage from the product and also from moisture and freezing temperature gaining access to the meat surface. Freezer burn of meat is caused by the meat surface being openly exposed to freezing temperatures. This results in discolouration on the meat surface once defrosted and causes the affected are to appear cooked. When freezing meat cuts that have bones in them, such as chops, shanks, ribs, osso bucco, racks, tails, trotters and T-bones it is important to reinforce the wrapping around any sharp points. This will ensure a tight seal and avoid the bones puncturing or piercing the packaging which can cause freezer burn and spoilage.
Basic guideline for Freezing times for Meat, Poultry, Fish and Seafood products (This is a guide only)
- Red Meats: 6 to 9 months
- Poultry: 3 to 6 months
- Fish and Seafood: 0 to3 months
De Frosting Meats and Food
Correct De Frosting of foods greatly reduces the risk of micro biological contamination and provides the best possible product post freezing. Meal planning is very important when choosing to use meat or food items that have been frozen. The safest way to defrost frozen products is in the refrigerator at a temperature between 2 and 5 degrees Celsius. This can take a few days to defrost the product, especially for larger sized cuts, however this method maintains the best possible quality of defrosted frozen foods. Ensure that the items being defrosted are well covered and placed onto a plate or tray that will catch any moisture that comes off the product. Place items on the bottom shelf in the refrigerator to avoid any drip loss from defrosting items dripping onto and cross contaminating other food items in the refrigerator. Microwave defrosting can be a practical method, however this tends to partly cook meat products if not carefully monitored.
Emergency defrosting in water can be conducted with small portions. For this process the product being defrosted must be totally sealed to avoid contact with the water. The water must be below 5 degrees Celsius. Allow the defrosting product to sit in its sealed packaging in the water for 20 minutes, after which it must be returned to the refrigerator to ensure the outer temperature remains below 5 degrees Celsius. The process can then be repeated again until the product has defrosted.
The worst possible way to defrost food is by leaving it out on the bench or in a sink at room temperature to defrost for hours on end, or all day whilst you`re out. This method allows the food product to sit for long periods in the “Temperature Danger Zone” between 5 and 60 degrees Celsius where bacteria doubles every 20 minutes. This is where things get very dangerous and nasty bugs like salmonella, E. coli, Staph Bacteria and campylobacter can really develop to dangerous and potentially fatal levels.
It is always important to consider all factors to ensure the safest possible food is prepared and put on the plate for all to enjoy, without the worry of becoming sick.
Clean Food Tastes Great.
How To Bake Whole Fish
Whole Baked Fish
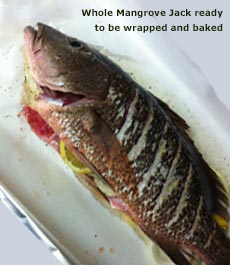
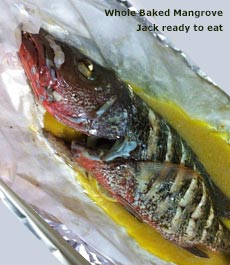
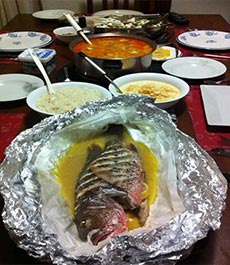
Baking Fish whole is an excellent way to serve and eat fish. This process cooks the fish whole within its own skin, highlighting the true flavour of the fish. Additional combinations of flavours can be added to enhance the flavour of the fish and also serve the purpose of providing a side dish.
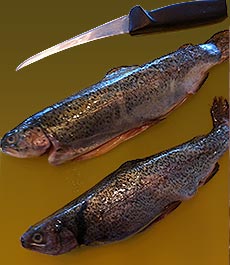
Most sized fish are suitable for this style of cooking, though it does depend on the size of your oven or cooker as to what you can actually fit into it. The best species to bake whole are white fleshed fish such as Snapper, Coral Trout, Red Emperor, Blue Bone, Barramundi, Mangrove Jack, Bream, and other varieties of reef species. Freshwater Trout also bake well whole. Pelagic type species like Mackerel, Tuna, Trevally, Mahi Mahi and Queenfish are less suitable to this style of cooking due to the levels of blood, oils and firmness of their flesh.
Preparing Fish for Baking Whole
Ensure that the fish is fresh. Scale the fish with an effective scaling tool. Try to avoid using knifes to scale fish as any slips can cause personal injury or damage to the flesh whilst scaling. Once scaled, rinse off in cold water. Lay the fish flat on its side on a cutting board and place the end point of a sharp knife into the anal passage. Whilst cutting away from yourself, make a continuous shallow incision moving towards the head of the fish. Try to avoid perforating the stomach contents as it has the potential to spoil the fish. Continue cutting forward between the pectoral fins and right through to the gills. Then carefully hold the stomach contents starting back where the incision started and peel and clean the entire contents out all the way up to the gills. Carefully cut around the gills where connected and pull them all out, taking care of sharp edges on the gills and the outer gill rakes. Scrape any blood or remaining stomach contents from the stomach cavity and then rinse in cold water. If the fish is too large for your oven you can trim the tail with heavy duty kitchen scissors and only if necessary remove the head. Avoid cutting the fish directly in half as this will allow all of the juices to leach out and cause the flesh to dry out. If you want to infuse flavours into the flesh of the fish you can make shallow incisions into the side of the fish.
Preparation for Cooking
Pre heat your oven / BBQ with lid to approx. 180 degrees Celsius. Lay out 2 sheets of aluminium foil crossed in the middle. Lay 2 crossed sheets of silicon or grease proof paper on the foil. Ensuring they are large enough to contain the fish when placed in the middle and the edges are able to fold up to encase the fish. Arrange a baking tray that will fit the foiled fish in for baking. It`s at this stage that you can be creative with flavours. I find there is less chance of burning the bottom side of the fish by creating a base to lay the fish on. This can be done by putting a variety of items as a base such as, sliced Lemons, sliced Potatoes, thick sliced Tomato, Carrots, Onions, Celery, Fennel, Celeriac etc. These can then be used as a condiment when served. Filling the stomach cavity also enhances the flavour and aroma of the Baked Fish. Again vegetables can be used or a bread stuffing can be made by combining fresh bread crumbs with a little melted butter, egg and seasonings all mixed together and stuffed into the stomach cavity. Types of seasonings and flavours suitable for fish include, Lemon, White Wine, Butter, Fresh Cracked Salt & Pepper, Dill, Parsley, Coriander, Garlic, Ginger, Chilli, Cajun, Tuscan, Tandoori, Thai, Moroccan, Laksa, Tom Yum or whatever your creative juices lead you too. One thing to keep in mind though is to ensure that the flavour combinations are not too strong or too much used that it will overpower the fish.
Assemble all ingredients, starting by laying down a base, place the fish onto the base. Fill the stomach cavity with the chosen filling. Make any required incisions as required or leave the top skin unbroken. Rub or sprinkle on the chosen seasonings. Pour a generous amount of white wine, fish stock or water into the base. Bring up all the edges around the Fish and then gently fold the edges over each other to form a puffed up type of parcel that is not tightly wrapped or touching the top of the fish.
Cooking times for Whole Baked Fish can vary a little depending on the thickness and size of the fish. As a rule of thumb allow approx. 35-40 minutes of cooking time in a pre-heated oven / BBQ per 1kg of Fish weight. To test for doneness, you can gently place a fork down between the fillets from the top dorsal fins and gently lift the flesh up. It will have an opaque to white colour close the thickest part when cooked. Another method is to hold onto the largest and thickest of the dorsal spines. If it pulls out easily when slowly pulled then the fish is ready. This method of Baking Fish Whole steam bakes the fish literally in a bag. En Papilotte is the French term for this style of wrapping with silicon / greaseproof paper, translated to – “in paper bag”. This method is great for doing smaller individual portions of filleted fish. All the same type seasonings and flavours are possible. Follow the same assembly steps and cook for only 12-16 minutes depending on thickness of the fish fillet. When these are served to the table and gently torn open, the aromas released when the steam escapes is amazing. Whole Baked Fish can also been done without the foil and silicon / grease proof paper packaging. The process for preparation and cooking time is all the same, except the Fish is not enclosed. It is recommended to line any baking trays with foil and silicon / grease proof paper to make cleaning the baking dish easier at the end. You can also cover the head and fins with greased silicon / grease proof paper which will avoid burning and enhance the final presentation.
Introduction to Meat Rubs and Marinades
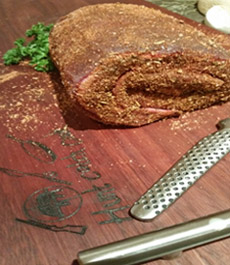
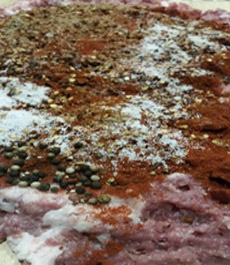
A meat rub is a mixture of spices and herbs that are applied directly to the meat before cooking as the name suggests the spices are rubbed directly onto the meat surface giving you a simple way to add flavour to any meat. There are two categories of Rubs:
- Dry Rub which are made from spices and seasoning only
- Wet rubs which contain some moist ingredients (Wet rubs should not be confused with Marinades)
Like any form of cooking there are some general rules when it comes to rubs:
- Use 2tbl spoons of rub to every 500g of mea
- Rubs using lemon juice or vinegar also change the foods texture because acids cure the meat
- After applying rub wrap the meat in plastic or use a cry vac machine and refrigerate before cooking
- Dry rubs only last for a few months in air tight containers or jars and are often made best fresh
- Dry rubs that contain sugar should be baked in a low to moderate oven to eliminate the risk of the sugars caramelizing and burning long before the meat is cooked
- Tenderizing meat using kiwi fruit rubbed on to the meat before applying the rub can be very beneficial. Slice and rub kiwi fruit before placing the meat in a zip lock bag in the refrigerator over the night to tenderize
- Use a small strip of meat to check rub before cooking or roasting the whole leg. Apply the rub and quick fry will determine flavour and saltiness. All this can be adjusted easily before applying to a large amount of meat
Salts and Sugars
A critical part of the rub recipe is the sugar to salt ratio. A higher ratio of salt works best in rubs for beef, fish and wild game while those which are high in sugar are better suited for pork.
- Salt - fine grain or table salt has additives
- Kosher salt – additive free and usually coarse grained. Best to use in salami`s, sausages and small goods
- Sea salt – made from evaporated sea water and can be very fine grained or larger grain depending on milling process. Larger grain is usually sold as rock salt (can also be called lake salt) is best to crush in mortar and pesto prior to use in a rub
- White sugar – highly refined cane sugar has sweetness but very little flavour
- Brown sugar – white sugar combined with molasses: adds flavour and with the addition of molasses will change colour of meat, the better of sugars to use
Peppers
Dry rubs need to have an element of heat and one of the best vehicles for this is pepper. Add ground pepper to the sugar-salt mix in small amounts at a time to avoid an overpowering pepper taste. Keeping in mind that black pepper will develop more flavour when cooked and once there is too much on the meat it is very had to remove or mask the taste.
- Cayenne pepper - this hot powder provides instant front end heat. Perfect for game meat that needs to be hot straight away and not an after taste
- White pepper – with a light colour and a mild flavour it provides gentle heat and back ground warmth with no cooking required to develop the flavour
- Black pepper - has a strong flavour and is best ground fresh to develop instant flavour and aroma. Can also be used whole for an instant flavour hit when bitten or cracked
Mild (Transition Spices)
Transition spices marry the sugars salts and peppers acting as a vehicle for flavour: these spices are not as dominant as others so can be added very liberally.
- Paprika – or powdered capsicum can come in many different forms and flavours including smoked and sweet. Hungarian paprika has a deeper, heartier flavour while Spanish has a more mild flavour there they would be better with fish or seafood
- Chilli powder – has a pungent earthy flavour and can vary in heat from mild to very hot. Use on all meats including poultry, fish and game meat
- Cumin –a nutty bitter flavour and native to the Mediterranean make this spice perfect for Asian, Mexican and Middle Eastern cuisine – use with most meats and perfect with goat
Secondary Spices (additional signature flavours)
- Coriander – or Chinese parsley has a very lemony or lime like flavour and develops well during the cooking process. Used with most game meats when fresh, however goes well with more mild meats in a rub like pork or seafood
- Dill – from the celery family and used in game meat soups and sauces this spice can go on all game meats especially poultry or game birds
- Garlic Powder/Garlic Flakes - are a great flavour boost for rubs and tend to develop more when cooked. Dehydrated and ground garlic is a very common spice mix and common seasoning. Use on all game meats and fish including game birds
- Onion Powder- is simply ground dehydrated onion and a very common seasoning in spice mix. Onion flakes can be used for heavy or more intense flavours and like garlic it can be used well on all game meats and fish
- Oregano – A warm and slightly bitter taste make this a great addition to any meat rub. Instant Italian /Mediterranean flavours are developed when using this herb /spice perfect with Goat, Venison and Buffalo
- Mustard Powder /Seeds – most mustard powder is ground seed coloured with Turmeric. Flavours can be developed when cooking and goes well with wild pork and venison
- Rosemary – very aromatic herb, commonly used in Italian cuisine this is the perfect addition to any goat, donkey or feral horse recipe
- Thyme – also an aromatic herb, thyme contains a lot of oil that is released during cooking giving a much more intense flavour. Use on all game meats.
Marinades
Marinades can be various combinations of liquids in which meat is immersed to add flavour. Marinades require even distribution around meat and require stirring occasionally to ensure even saturation. Traditionally made up of red wine, vinegar or oil (or a combination) and a mix of herbs and spices some marinades can have an overpowering taste. Tender meat is achieved by using the right cut for the way you’ve chosen to cook and by cooking it well.
- How long to marinate? Refrigerate marinated meat unless you are going to cook it with in 20 mins of preparation of marinade
- To achieve complete saturation of meat using a marinade it is recommended to stand covered and refrigerated for 12-24hrs (larger cuts of meat ex: roasts or steaks) for smaller cuts of meat ex: cubes or strips (jerky or stir fry) a maximum of 1/2hr is all that is required to make saturation
- Don’t pour marinade over meat while cooking; this will only stew meat and burn the excess marinade on the surface of the pan or BBQ plate. Use a brush to cover the meat as it cooks, keeping it moist a little at a time
- Never pour left over marinade over cooked meat! The marinade mixture must always be brought to boiling point and boiled for a few minutes to kill any harmful bacteria. It is only then safe to serve
- Popular marinade combinations include:
- Soy sauce a little honey or maple syrup and orange juice
- Tomato sauce, red wine, vinegar and Dijon mustard
- Olive oil a little lemon juice and Italian herbs
- Soy sauce, oyster sauce and sesame oil
